
这篇文章主要讲解了“Hibernate怎么创建和配置”,文中的讲解内容简单清晰,易于学习与理解,下面请大家跟着小编的思路慢慢深入,一起来研究和学习“Hibernate怎么创建和配置”吧!
1.获取Hibernate
既然要使用Hibernate来开发应用,那么就必须先获取Hibernate的发布包,我们可以下载自己需要的版本,我下载的是hibernate-search-4.4.0.Alpha2。
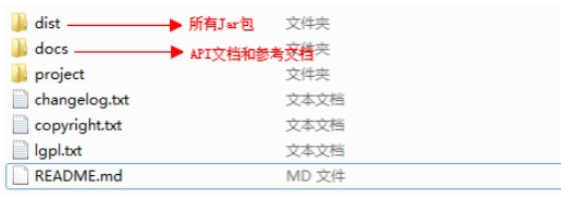
下载完成,解压后得到以下内容:
2.创建Hibernate项目,添加Jar包
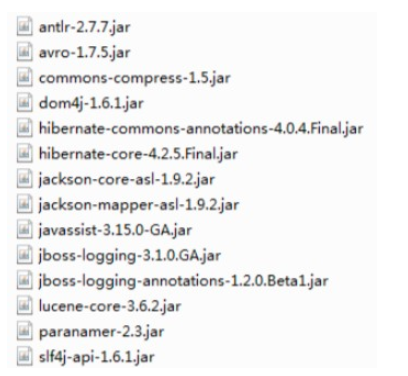
创建一个Java Project,建好项目之后,需要添加上Hibernate运行所必须的Jar包,如果不知道哪些可以不添加就直接添加lib\required中的所有Jar包,如果清楚的知道每个包的作用就可以进行相应的删减。
3.创建持久化类
packageevents;importjava.util.Date;publicclassEvent{privateLongid;privateStringtitle;privateDatedate;publicEvent(){
}publicLonggetId(){returnid;
}privatevoidsetId(Longid){this.id=id;
}publicDategetDate(){returndate;
}publicvoidsetDate(Datedate){this.date=date;
}publicStringgetTitle(){returntitle;
}publicvoidsetTitle(Stringtitle){this.title=title;
}
}
注意:
(1)无参构造函数的作用是用于Hibernate通过反射机制来实例化类对象的时候。
(2)在所有的持久化实体类中都需要一个唯一的标识符属性。
(3)通常不会操作对象的标识(identity),因此它的setter方法的访问级别应该声明private。这样当对象被保存的时候,只有Hibernate可以为它分配标识符值。
4.映射文件
映射文件的作用就是告诉Hibernate应该访问哪个数据库(database)中的哪张表(table)的哪些字段(column)。
映射文件应该保存在持久类的源文件目录下,映射文件可随意地命名,但hbm.xml的后缀已成为Hibernate开发者社区的约定。
本例用到的映射文件如下:
<?xmlversion="1.0"encoding="UTF-8"?><!DOCTYPEhibernate-mappingPUBLIC
"-//Hibernate/HibernateMappingDTD3.0//EN"
"http://hibernate.sourceforge.net/hibernate-mapping-3.0.dtd"><hibernate-mappingpackage="events">
<classname="Event"table="EVENTS">
<!--id用于标示标识符属性,即数据表的主键,name对应实体中的属性名,column对应数据表中的字段名-->
<idname="id"column="EVENT_ID">
<!--配置标识符的生成策略-->
<generatorclass="native"/>
</id>
<!--property标示实体类中的非标识符属性,
type指定Hibernate映射类型,它们能使Java数据类型与SQL数据类型相互转换
-->
<propertyname="date"type="timestamp"column="EVENT_DATE"/>
<!--若不指定column属性,则表示实体对象的属性名即为数据表中字段的名称-->
<propertyname="title"/>
</class></hibernate-mapping>
5.Hibernate配置
通过配置文件将应用程序与数据库连接,配置数据库的相关属性。此外,还要添加映射文件资源,使得Hibernate能够找到映射文件,并将映射文件与实体类关联。
<?xmlversion="1.0"encoding="UTF-8"?><!DOCTYPEhibernate-configurationPUBLIC
"-//Hibernate/HibernateConfigurationDTD3.0//EN"
"http://hibernate.sourceforge.net/hibernate-configuration-3.0.dtd"><hibernate-configuration>
<session-factory>
<!--设置连接数据库的驱动-->
<propertyname="connection.driver_class">com.mysql.jdbc.Driver</property>
<!--设置数据库服务器的连接路径-->
<propertyname="connection.url">jdbc:mysql://localhost:3306/db</property>
<!--设置数据库服务器的连接用户-->
<propertyname="connection.username">root</property>
<!--设置数据库服务器的连接用户的密码-->
<propertyname="connection.password">Lynn0714</property>
<!--数据库连接池大小-->
<propertyname="connection.pool_size">1</property>
<!--SQL方言,要根据使用的数据库来配置-->
<propertyname="dialect">org.hibernate.dialect.MySQLDialect</property>
<!--设置Hibernate的自动session管理-->
<propertyname="current_session_context_class">thread</property>
<!--设置二级cache-->
<propertyname="cache.provider_class">org.hibernate.cache.NoCacheProvider</property>
<!--设置运行时是否显示调用的SQL语句-->
<propertyname="show_sql">true</property>
<!--Dropandre-createthedatabaseschemaonstartup-->
<propertyname="hbm2ddl.auto">create</property>
<!--使用的映射文件-->
<mappingresource="events/events.hbm.xml"/>
</session-factory></hibernate-configuration>
上图配置并不是包含所有内容
上图配置了Hibernate的SessionFactory,一个关联于特定数据库全局的工厂(factory)。如果你要使用多个数据库,就要用多个的,通常把它们放在多个配置文件中。(Hibernate如何识别是在何时使用哪个配置文件?)
6.用Ant构建
此处Ant操作全部仿照操作,不知道具体如何使用。
7.启动和辅助类
在这个环节中,需要创建一个全局的SessionFactory,通过SessionFactory来创建并打开Session,一个Session代表一个单线程的单元操作,SessionFactory则是个线程安全的全局对象,只需要被实例化一次。
packageutil;importorg.hibernate.SessionFactory;importorg.hibernate.cfg.Configuration;publicclassHibernateUtil{privatestaticfinalSessionFactorysessionFactory;static{try{
sessionFactory=newConfiguration().configure().buildSessionFactory();
}catch(Throwableex){
System.err.println("初始化SessionFactory失败"+ex);thrownewExceptionInInitializerError(ex);
}
}publicstaticSessionFactorygetSessionFactory(){returnsessionFactory;
}
}
8.加载并存储对象
packageevents;importjava.util.Date;importorg.hibernate.Session;importutil.HibernateUtil;publicclassEventManager{publicstaticvoidmain(String[]args){
EventManagermgr=newEventManager();if(args[0].equals("store")){
mgr.createAndStoreEvent("MyEvent",newDate());
}
HibernateUtil.getSessionFactory().close();
}privatevoidcreateAndStoreEvent(Stringtitle,DatetheDate){
Sessionsession=HibernateUtil.getSessionFactory().getCurrentSession();
session.beginTransaction();
EventtheEvent=newEvent();
theEvent.setTitle(title);
theEvent.setDate(theDate);
session.save(theEvent);
session.getTransaction().commit();
}
}
按上述步骤操作完成,运行后出现下面异常:

出现java.lang.UnsupportedClassVersionError 错误的原因,是因为我们使用高版本的JDK编译的Java class文件试图在较低版本的JVM上运行,所报的错误。
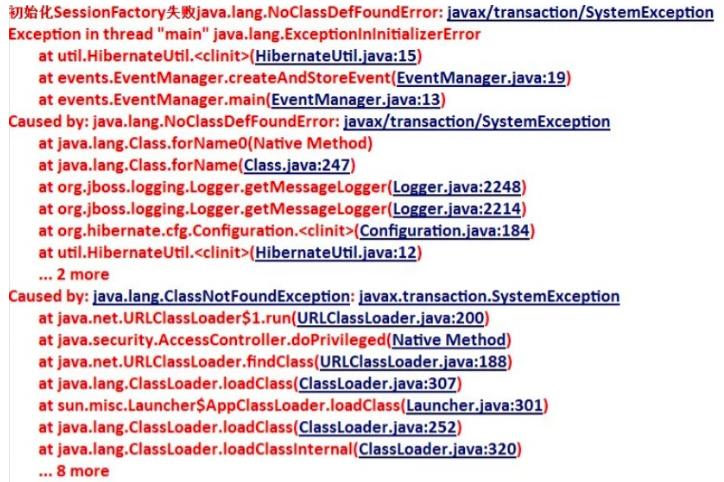
出现这个错误,是因为缺少JTA的Jar包,添加上即可,由于我也不知道哪些是必须的就添加了lib\provided目录下的所有Jar包
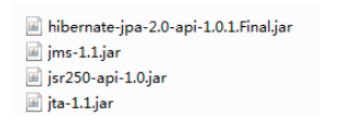
修正上述两个错误后,运行成功

感谢各位的阅读,以上就是“Hibernate怎么创建和配置”的内容了,经过本文的学习后,相信大家对Hibernate怎么创建和配置这一问题有了更深刻的体会,具体使用情况还需要大家实践验证。这里是,小编将为大家推送更多相关知识点的文章,欢迎关注!
推荐阅读:如何搭建和配置elasticsearch?


发表评论 取消回复